With the Peppered streaming-option you are able to set up both paid and free streaming videos on your website. In this manual we will walk you through the options.
You can also reply the most recent webinar about this topic:
Livestream & Visitor tags 8th of April 2021
Sell access to a stream
In case of a paid (streaming) video, you need to sell access to it. You will have to set up and sell a special event on your website to sell access to the stream or video.
You can enter the URL of the (future) stream location on the "Event" page. Also add a name for the button that links to the stream. This information will replace the e-ticket. 
On the "Production" page, select "online" or "mixed" for "Attendance", depending on whether you have only online or both online and offline events in this production. This will tell Google what kind of event you are hosting. Attendance mode "online" will also disable the Covid-notification you may have activated for the order process.

The stream URL will be accessible via the link in the order confirmation email and via the event in the personal "My Events" page on the website as well. It replaces the e-tickets button.
Manage selective access to the stream location
- Use visitor tags
Make sure that everyone who buys the event will get a special visitor tag. You can add visitor tags to the event on the "Events" page in your dashboard. This will make sure that everybody that buys a ticket for this event, will automatically get the visitor tag in his/her account in Peppered.
You can create a visitor tag in Peppered for this case and use this tag. This tag will not be synchronized to your ticketingsystem.
You can also use visitor tags that are synced from your ticketing system. Currently, this works for all ticketing systems except for RCX and GAT. Please contact an Expert for more information about this features combining RCX and GAT ticketing systems.
Can't you find the visitor tag you want to use? Then it might not yet be present in Peppered. Try adding the tag to your account in the box-office system and then log into the website to obtain the tag. Manage and activate your tags in the "Visitor tags" module.
With the visitor tag only available to people who bought a ticket to the streaming event, you can now use this visitor tag to provide selective access to a page on your website where the stream will be offered. - Create a page
Create a page on your website and make sure it is not accessible via the main menu. Embed the video or stream on that page, or provide information about how to access the stream if it is hosted elsewhere (like a URL and password to link to an external Zoom webinar.)
TIP: With a paid Vimeo account you can use the option to embed the video on a specific domain (your own website): Even if somebody could retrieve the original video URL, they still cannot use it, for it will not play anywhere outside of your website.
 - Provide selective access
Use visitor tags for selective access to that page or a specific part within your page where the stream is placed. Select the visitor tag(s) of the people you want to allow to access the (part of the) page. Now people need to log in and have the correct visitor tag to access your video or stream.
- Do not allow indexing
Make sure you set "Allow indexing" to "no" to prevent Google from finding the page. - Communicate the page
Optionally communicate the page in the personal account menu:
To do this, create a new menu item in the "Visitor account" part of the menu module, that links to the page:
Dashboard > Website > Menu. If your menu module does not have the "Visitor account" menu part, contact one of our experts to arrange this for you.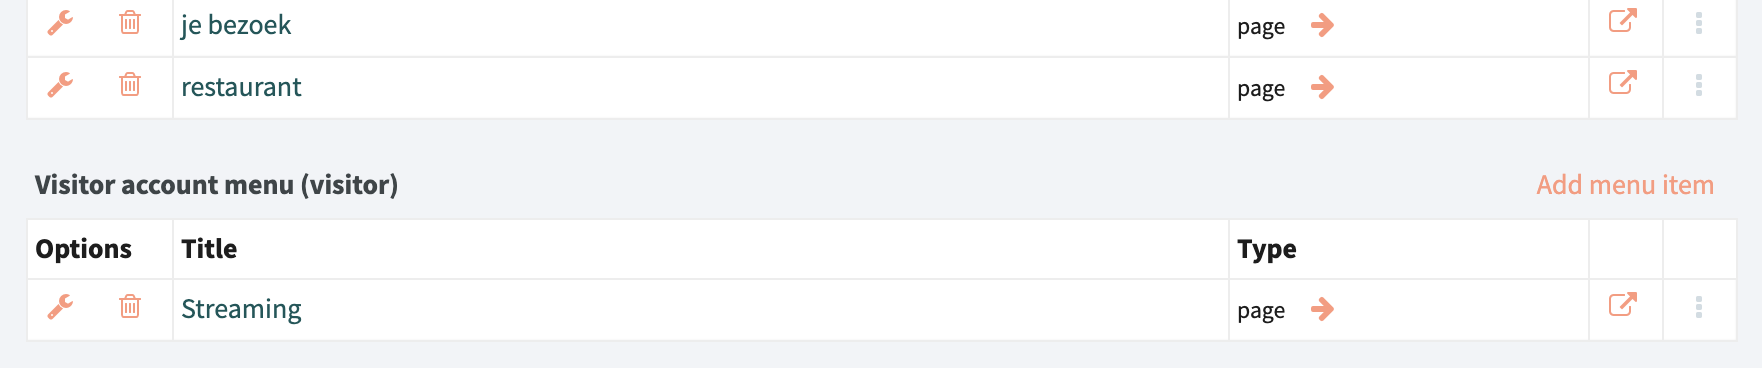
Free streaming
You can also provide free access to a stream or video and offer the link to the stream directly on the event page or the event in your calendar. The "ticketing" button of the event can be replaced by a "Watch now" button!

For this option, you also need to enter the URL of the (future) stream location on the "Events" page in the dashboard, and add a name for the button that links to the stream.
You also need to change the status of the event to "Free online".
If you do not have this status yet, you can create this yourself in the "Statuses" module.
Add a new status, and give it any name you deem suitable. Make sure the system name is always called "free_online". The Peppered code needs this system name in order for the button to work properly on the website (see our statuses module for more information).
General information
Live streaming vs regular video
The first thing to consider when offering a video broadcast of an event, is whether you want to stream the event live as a one time event, or if you want the video to be available for a longer time, thus to be played back on demand.
Live streaming has the advantage that it creates exclusivity. You have to be there, it is happening live, and perhaps you can get some interactions with your remote audience. But offering live streams also has some technical difficulties, as you need to have the hardware and software in your venue to actually record and process the recording for live streaming.
Live streaming can be arranged via a lot of online platforms. The most popular are:
While streaming on Facebook and Youtube is free, you need a paid subscription for Vimeo and Zoom. The biggest differences are:
Free streaming (Youtube live, Facebook live):
- Advertisements
- No personalized branding possible
- No customer service support
Paid streaming (Vimeo live, Zoom):
- Add-free
- Layout can be personalized with your own branding
- Customer service support
Regular video has the advantage that you can watch the video in your own time, and as many times as you would like. In addition, it enables you to edit and process the video after recording the event to tidy it up and add extra features (like subtitles, intro's, etcetera).
For publishing regular video, Vimeo and Youtube are well-known services. The same free and paid options are available as mentioned above.
Embedding on your website
Vimeo and Youtube both offer ways to embed a video or a livestream on your website. Usually, this would be done with an iFrame on a page. Facebook and Zoom streams are a bit more tricky to embed, for they require developer tools to get it working. With Zoom you could choose to provide the video URL and a password on your website.
Accessibility management (who can access the video?)
If the video or stream is accessible for everyone, any of the above platforms can be suitable. But what if you want to offer an exclusive stream? For instance for specific people who have paid to get access to the video or livestream?
There are multiple options to do this. The most important part to consider is, while you can manage access to embedded videos and streams on your own website, you cannot prevent people from sharing links if the video or stream is also available on its native platform. Youtube videos can be marked as "unlisted" on Youtube, but people can often copy the link to the original video on Youtube from the iFrame on your website, and share it with anyone they want. Vimeo offers a nice option for streaming/playing video on specific domains only.
Tips from other theatres/Peppered Users
When using visitor tags to get access to a Livestream:
Make sure your streaming page is visible to everyone. Logging in is necessary to get access to the livestream. If the whole page is secured by a visitor tag and you share the direct link to this page, there is a change if the visitor is not logged in yet. They will then end up with a "Page not Found" mention, because the system does not recognize this customer.
Important: this is only possible when you do not use the link to the livestream page in My Account. My Account vs livestream page only works via visitor tags that you already add to the page. So a pre-note is not possible in this case.
When using Vimeo/Youtube:
If you use this on a Page and want to secure it with visitor tags make sure you select the Video part instead of the Iframe part.
Using VixyVideo (NEP) instead of Vimeo/Youtube:
It is possible to use this. Add code to the description part using 'source code' under 'edit' and add the embedded link in another part. Using a link within the Iframe it is not possible to get a full screen view. Doing it this way it is possible to get fullscreen.
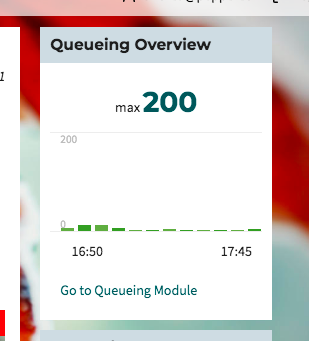
Check your queue:
Expecting a lot of visitors for your livestream? Please check your queue in the dashboard. In the printscreen below, you see that the maximum of visitors on the website is 200 at a time. In this example, if you already sold 150 tickets, make sure to raise your queue and set it to 500 visitors.
More about the queue can be found here.
Keywords: Livestream Live Stream sell Paid online voorstelling